Chains are the driving force behind all bikes. You’re not going to have much fun or get very far without one. Whether you’re riding single speed or a dual speed mountain bike, it’s likely that at some point you’ll need to learn how to tighten a bike chain.
From my experience, when riding a BMX you’ll be adjusting your wheel and chain fairly regularly which can be a pain if you haven’t got the skill perfected. On the other hand, it’s much less common that you’ll have to tighten your bike chain, although it’s often more difficult to tighten these chains.
The method of tightening a chain on a single speed bike and a dual speed bike is very different. The differences in the anatomy of these bikes simply make it impossible to alter the bike in such a way that the chain becomes tight.
In this article, I will explain the differences between the two types of chains, ways to determine if your chain is too tight, how to tighten your chain and I will finish with some great tips you can use to quickly tighten a bike chain while keeping it tight for a long period of time.
BMX vs Mountain Bike Chains
![]() Photo by @mrmascott10
Photo by @mrmascott10
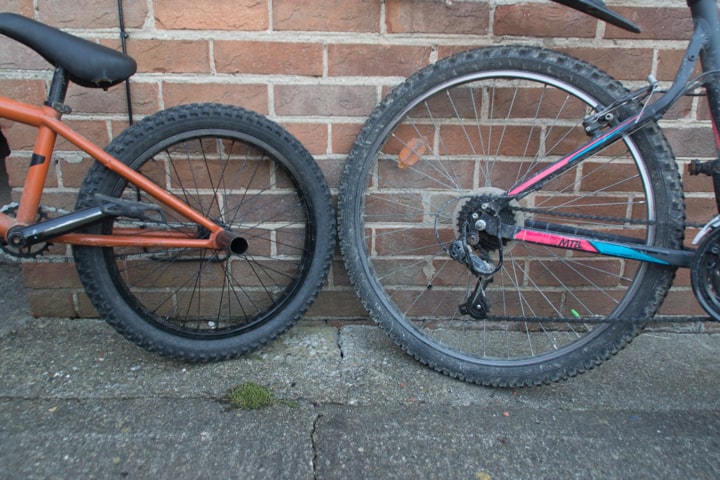
It’s hard to see unless you’re actively looking but chains are actually made significantly different depending on what bike they’re going on and what speed the derailleur is. There is one main rule you need to remember. Mountain bike chains CAN be used on BMX bikes but BMX chains CANNOT be used on dual geared bikes. Even though it’s possible to use the mountain bike variants on BMX’s, it’s not always recommended for reasons I will explain below.
Single speed chains have to be stronger than dual speed chains. Having no derailleur means that pedalling is often done with difficulty as the gearing is made harder to allow for riding in many situations. Trials bikes are the exception to this rule but that is a totally different subject and definitely not the norm.
Having multiple gears allows riders to constantly be riding without exerting extreme pressure on their cranks, chainrings, gears or chain. The chains on these bikes then can be produced without the essential need for extra strength. Space limitations due to the compactness of a rear chainring set mean that the chain simply can’t be super thick. This isn’t a worry for BMX and other single speed bikes as the chain won’t be pressed up against another chainring on either side. As shown in the table below, external widths gradually get smaller depending on the number of gears you have.
| No. of Gears | Plate Width |
|---|---|
| 6 | 7.8mm |
| 7 | 7.3mm |
| 8 | 7.3mm |
| 9 | 6.6mm |
| 10 | 6.2mm |
| 11 | 5.5mm |
| 12 | 5.25mm |
There are several different roller widths at use on different bikes. The roller width is the inner width between the outer plates. BMX, coaster and track bikes regularly have widths of 3.2mm, which is slightly wider than the 2.4mm chains, used on regular MTB, touring and other multi-geared bikes.
Bike Chain Maintenance
![]() Photo by @mrmascott10
Photo by @mrmascott10
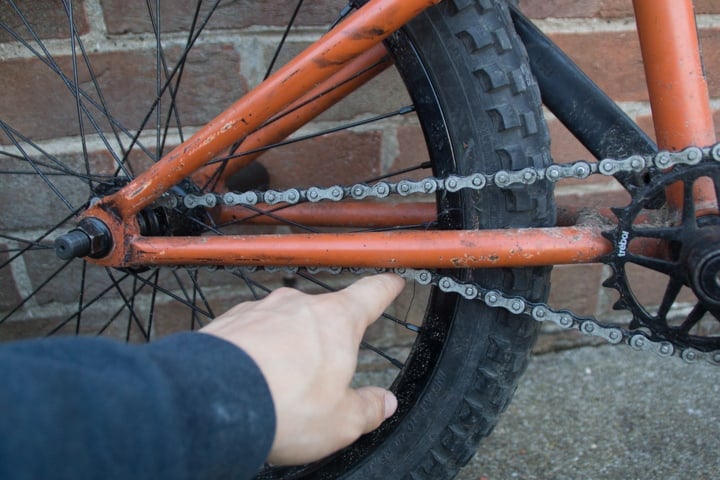
There are various reasons that bicycle chains become loose. Some are directly related to maintenance, others due to certain types of riding and there are many many ways that chains can simply become slack over time. I mentioned above that in my riding career I have found myself tightening BMX chains way more than any others. The single speed design, easy disassembly and rough riding are the main reasons for this.
When driving to and from skateparks it’s common for you to have to remove one or both wheels in order to fit everything in your car. If you own a frame with a short backend or have pegs, keeping your chain tight when putting your wheel back on your bike can be a real pain.
If your wheel isn’t super tight then a session of peg riding will nearly always result in your wheel moving about and your chain becoming super loose. The rough bashes that your wheel, axle and peg receive when grinding can easily push your wheel forward or over to one side. There are a few more reasons why your mountain bike chain may become loose. The amount of dirt and extra components means maintenance is much more important to keep everything working smoothly.
Unlike single speed bikes where chains become loose from crashes or disassembly, a multi gear bike regularly looses tension due to component wear and maintenance issues. The teeth on your chainrings and derailleurs wear down quicker than you may think. Dirt, water and the metal of the chain rubbing against your chainring teeth can break down the metal and plastic fast. Be careful and check your derailleur and chainring don’t need replacing before you start shortening your chain.
How to Tighten a BMX Chain
1. Is my Chain Already Tight Enough?
![]() Photo by @mrmascott10
Photo by @mrmascott10
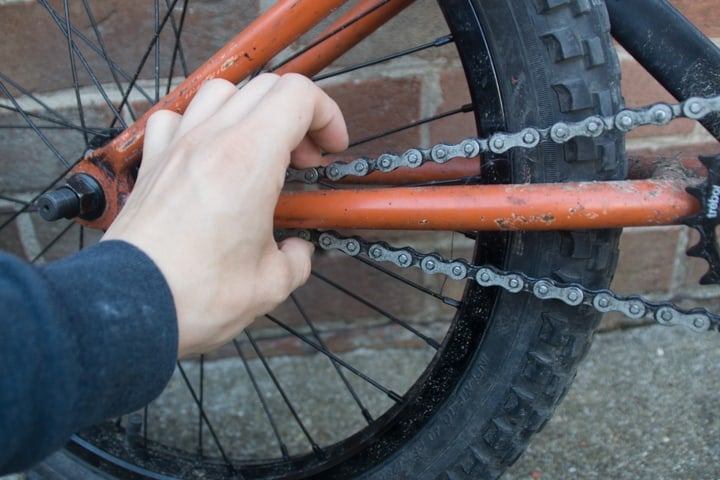
Unlike geared bike chains, diagnosing whether a BMX chain needs to be tightened is very easy. The simple method is to get your hands on the chain and pinch it together. If you can easily remove the chain from its chainring or touch the metal of the frame then it’s far too loose. A correctly installed chain will have a small amount of movement when pinching together. You don’t want to be able to hear anything rattle when you ride but you also want enough flexibility to pedal easily.
If your chain is tight enough to stay on and not hit the rear triangle of the frame then there is no real problem. On the other end of the spectrum, it’s very easy and very possible to over tighten a bike chain. Your chain is much more likely to snap when your chain is too tight. There will be no slack to take up when you begin to pedal hard. No slack will also be a problem if you hit your chain against anything. Instead of being able to use the slack in the chain to protect itself, it’ll have to take the full force of the collision immediately.
2. Is the Chain too Long
The next step is to ensure that your chain has the correct amount of links. This is especially important for BMX and single speed bikes due to the short rear dropouts. You don’t have a lot of space to play with, to begin with, so it’s a good idea to start with the right amount of links.
Most BMX chains will fit your bike perfectly as they are developed to have the correct amount of links. If however, you have a fixie or race bike with a much larger chainring you may have a problem. There is no clever way of checking if the length is correct. You simply need to loosely slot your rear wheel into your dropouts and offer your chain up to the chainrings. If you have a little slack that could realistically be taken up when pulling the wheel backwards, you have a good length.
To measure your chain to the correct length, push the wheel as far forward as possible in the dropouts and wrap the chain around both your chainrings. The chain should overlap itself by one link. When you have found this length, simply use your chain tool to remove as many links as necessary.
How to Shorten a Single Speed Chain
- For biking chains that have a master link, release it and put the parts in a safe place. The next step is to grab your chain tool, loosen the screw almost as far as it will go.
- Place the chain into the link tool. These tools are designed to hold the chain easily and firmly so it should just push straight in and sit tightly.
- The third and final step is tightening the screw back down on to the chain. Chain pins are sometimes very stiff so this may take some force but don’t worry. If you don’t plan on putting the links back on the chain anytime soon, turn the handle until the pin is completely out and then reattach the master link. It’s much harder to do but through trial and error, you can release the link plates while keeping the pin in the plate.
What is a Master Link?
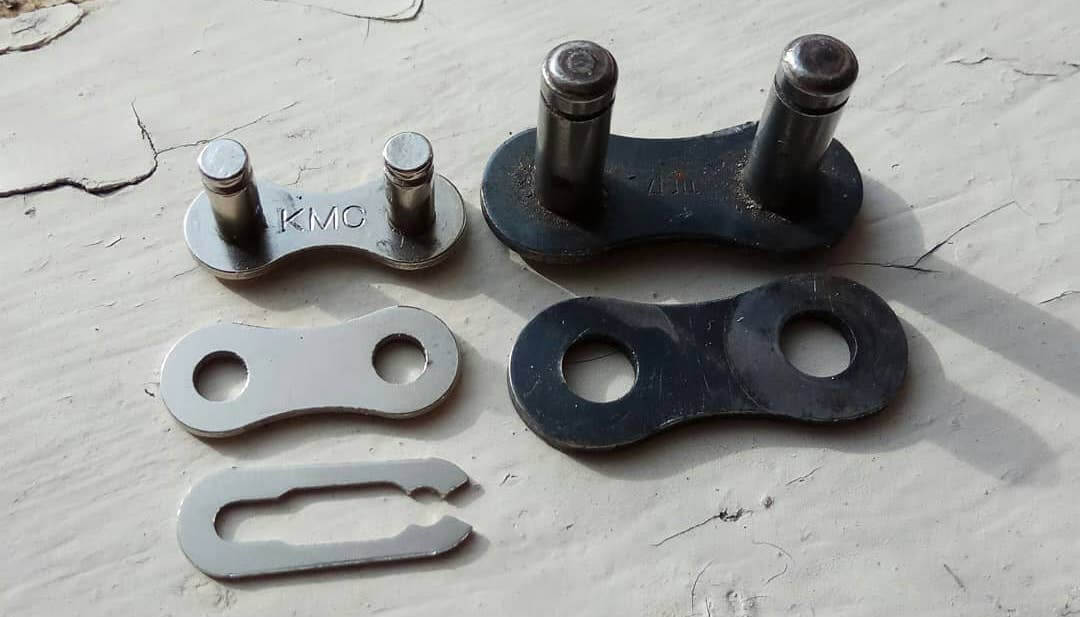
A master link is a quick-release link added to the newer roller chains. The link allows for easy assembly and disassembly of chains the chain without the need for a chain breaker. This nifty little feature is great for replacing or switching the side of your chain but unfortunately can’t be used to shorten or lengthen it, for that you definitely will need a chain breaker tool.
A master link is easily recognizable by the extra metal plate added to the front of the link. As you can see in the image above, there is a different sort of side plate that is open at one end. This is the retaining piece to stops everything from falling apart.
To release this link, simply pull the smaller, springy faceplate apart at the open and, slide it sideways across the pin and then pull it off. This is all that’s holding everything in place so, after this, your faceplate and pins will fall out rather easily. Be careful not to lose anything important!
Setting up Your Bike
![]() Photo by @mrmascott10
Photo by @mrmascott10
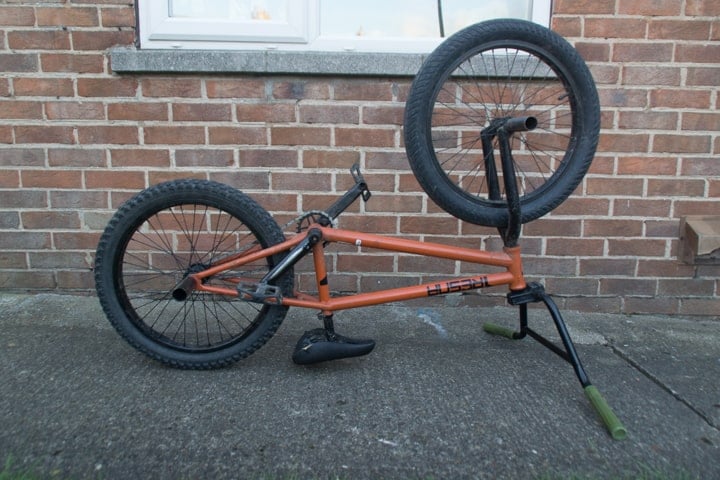
Now we have the most confusing steps out the way you can concentrate on getting your chain nice and tight. In order to get your wheel straight, your chain tight and your bolts tight you need to find a good area to work in.
You will need your tools at arms to reach as you will be sat behind your wheel. Also, keep your wheel and other bike parts handy because there’s nothing less fun than having to go across the room to get something you forgot earlier.
If you haven’t already, raise your seat slightly so your wheel can spin freely when placed upside down. Speaking of which, now is a good time to turn your bike upside down and rest it on the bars and seat. This is the best position to alter your wheels and chain from because you can access your bike from all sides without having to hold it up.
Tools to Unlink a Chain
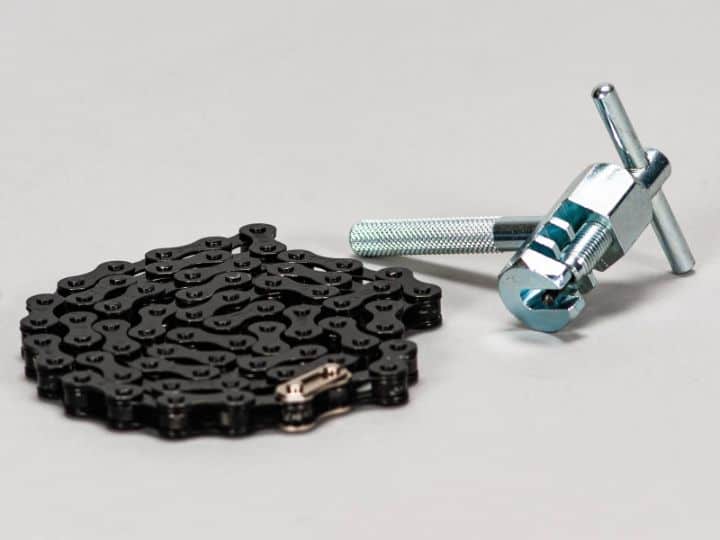
Single speed bike maintenance as a whole doesn’t require much in terms of tooling. The lack of gears and suspension eliminates a lot of the most complicated parts of a bike. While you can do the whole process of chain tightening with a single spanner, I would recommend having one for each side of the wheel. Make sure the spanner you buy or pick out will fit your wheel.
Bike hubs come in both male and female variations. Male hubs have an axle that goes through the hub and the dropouts. This is then tightened with a nut and thus needs a spanner or socket. Female hubs stop at the bushes and are threaded internally. A bolt then goes through the axle and is normally tightened with an allen key.
Female axles are considered to be stronger than male as they don’t have an external piece of threaded metal sticking out either end of the dropouts. A disadvantage is that female axles can’t be used with pegs. For this reason, they are much less common for BMX bikes.
Once you have the correct allen key, spanner or socket I would suggest you find one of the bigger spanners you have. It doesn’t matter what size this is, as long as you can get a good amount of leverage with it.
Loosen Your Wheel
![]() Photo by @mrmascott10
Photo by @mrmascott10
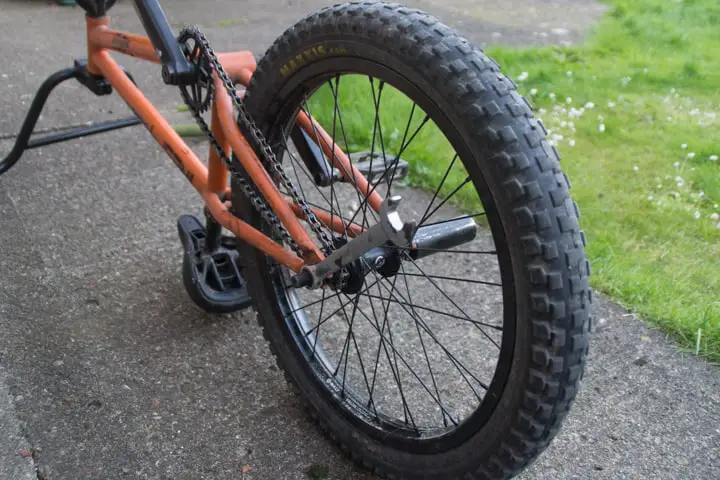
The next step is to loosen your back wheel. Use the tools you collected in step 4 and simply loosen the wheel to the point you can move each side freely. While there’s no problem in completely removing your wheel nuts during this step, I would recommend loosening the wheel to finger tight. This makes it much faster to tighten your wheel while holding it in the correct place.
Positioning the Wheel
Chain Tensioners – Built in vs Added
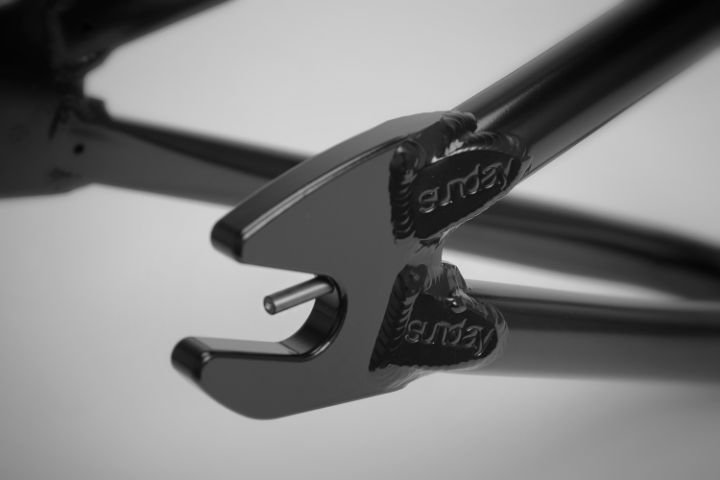
Chain tensioners are very different depending on what type of bike you’re riding. Within BMX there are two variations. Frames can have tensioners built into the frame or as a separate product you add when attaching the wheel.
Built-in tensioners push the wheel towards the back of the bike while separately added chain devices pull the wheel back.
A. With Chain Tensioners
This step is different whether you have chain tensioners or not. Chain tighteners can be built into your bike or separate. While they are incredibly useful for keeping your chain tight, there are a lot of frame designs that aren’t brilliant for chain tensioners.
Having said that now is the time to use your chain tensioners. Most built-in tensioners will be placed ahead of the dropouts in the rear triangle. Tensioners not included in the bike frame are usually added to the axles before the nut and then placed over the rear dropout.
Always make sure to keep your chain on your bike and also tighten each side equally. Keeping the chain on will let you easily know when to stop tightening, with the best part being your wheel will be held perfectly in place while you tighten your wheel nuts. Tightening each side equally is just as important. It doesn’t take much misalignment before your tires start rubbing on your frame.
B. Without Chain Tensioners
The process of tightening your chain without bike tensioners is effectively exactly the same. The only difference is that the process not including chain tensioners is much more of a nuisance.
Your main problem with this method is keeping your wheel far enough back and centrally aligned while tightening the wheel nuts.
The best method I have found to counteract this problem is to use a large spanner or metal bar that you can push between the wheel and the bottom bracket area of the frame. You can then push on this, using it as a lever to push the wheel as far back as it will go. This spanner can also be tilted to either side aligning your wheel as centrally as possible.
Tightening Everything Up
All the steps leading up to now are relatively simple. It’s mainly just a process of setting up your workspace and loosening everything up.
As I’ve mentioned before, this step is very easy with chain tensioners. If used correctly they will have the wheel positioned and tightened up almost perfectly. All the nuts are for is to stop the wheel from falling out.
Those of you without chain tensioners will need to carefully tighten each side of your wheel intermittently until the wheel is completely secure and aligned. If there’s nothing to counteract it, the rotation of your wheel nuts will move the axle along with the dropouts. The only way to prevent this is by tightening each side a little at a time. Aim to get each side tight enough so that the tension of the chain won’t move the wheel and then proceed to fully tighten each nut.
Keeping your Chain Tight
Now you have a perfectly tightened chain the aim is to keep it that way. The real pain is if you need to take your wheel off to get it in the car.
If you manage to keep your wheel on for a while there are a couple of different tips you can use to keep your chain nice and tight.
Issues with the bikes sprocket, chainring and chain can result in problems keeping the chain tight and the wheel aligned.
The first thing to do is to inspect your bottom bracket and front chainring. If you have the time, give it a good clean and make sure it’s aligned correctly. Misaligned or worn chainrings can quickly wear on your chain. The same problem can occur on the rear sprocket. If you have either of these problems sometimes the easiest thing to do is replace it.
I’ve already mentioned this above but chain tensioners are a brilliant solution for slack chains. They can be installed quickly, can be altered without any hassle and are super cheap. You don’t even need a tensioner on each side of your wheel for them to work effectively.
Easy Way to Tension Your Fixed Gear Chain
Best BMX Chain Tensioner
Tightening a Multi Gear Bike (MTB) Chain
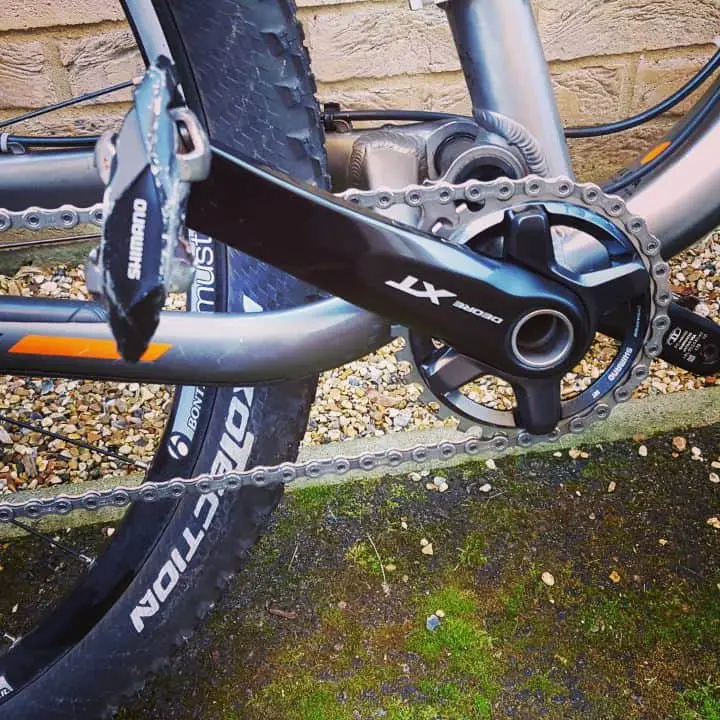
1. Is my Chain Already Tight Enough
Diagnosing and tightening a MTB bike chain is a little more difficult than a single speed BMX. Due to the extensive amount of moving parts and suspension used on a multi gear bike, it’s much harder to tell if your chain needs to be shortened or if you’re having maintenance issues on your derailleur.
Before you go out and fiddle with your bike, make sure that your chain actually does need to be tightened. There are far too many people that will just remove a couple of links or mess with their setup just for the sake of it.
It may sound simple but the only way to tell if you’re chain is too tight is by riding your bike. Simply go out on the road or a simple bike trail and give your gears a good test. If your chain slips or if your gears don’t change as easily as you’d like then some maintenance may be the best thing you can do.
Now you know your chain needs tightening you need to diagnose what is causing it. There are two main causes of loose mountain bike chains. The first is the length of the chain itself. Multiple Geared chains come in different sizes depending on the number of chainrings you have on your bike. A 10-speed chain on a 9-speed bike will simply be too long for the bike and will almost definitely need shortening. Derailleurs are another reason for a slack chain. There are many ways to adjust your derailleur, tightening and loosening the chain is just one of them.
2. Worn Chainrings
![]() Photo by @mrmascott10
Photo by @mrmascott10
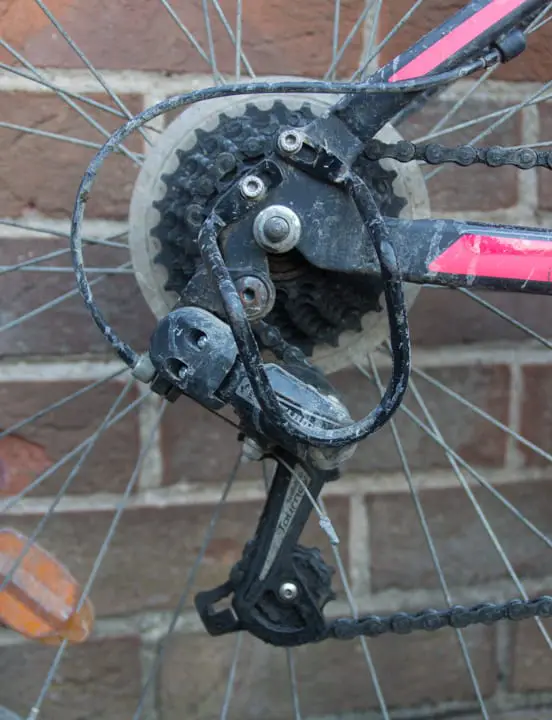
A chain jumping off its cog or slipping on its chainrings is the main diagnosis for a loose chain. I’m saying this again because worn chainrings and cogs can also present the same symptoms.
Before splitting your chain or altering the screws on your derailleur have a look at your chainrings without your chain on. It’s normally fairly easy to recognise if your chainrings are too worn. They will be much more curved than normal.
There is no way to reverse worn cogs so your best bet is to replace them to prevent your chain slipping.
3. Loose Bottom Brackets
![]() Photo by @mrmascott10
Photo by @mrmascott10
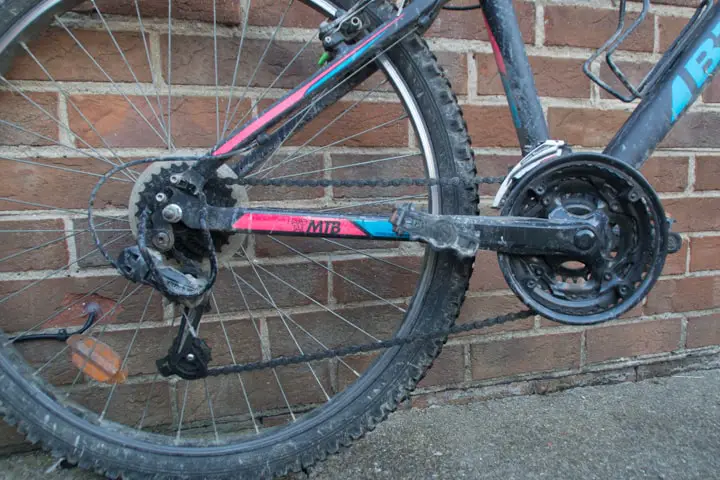
Loose and worn bearings are a hidden nightmare for many bike riders. Unfortunately, problems with bearing races are completely unnoticeable until you disassemble your bike and take a look inside.
A loose bottom bracket or worn bearings start to become a problem for chain tightness when they develop play in the area they’re situated. The bottom bracket, for example, should be solid and not tilt or move in any way.
If you can feel play in your wheel or bottom bracket when inspecting then it may be time to readjust the unit. Readjustment can mean several different things in this situation. Firstly, try just giving everything a good clean, lubrication and tighten. In a lot of cases, this can fix the issue.
Persisting slackness, unfortunately, needs to be met with a new set of bearings. They really aren’t expensive and are super easy to fit.
4. Freewheel and Freehubs
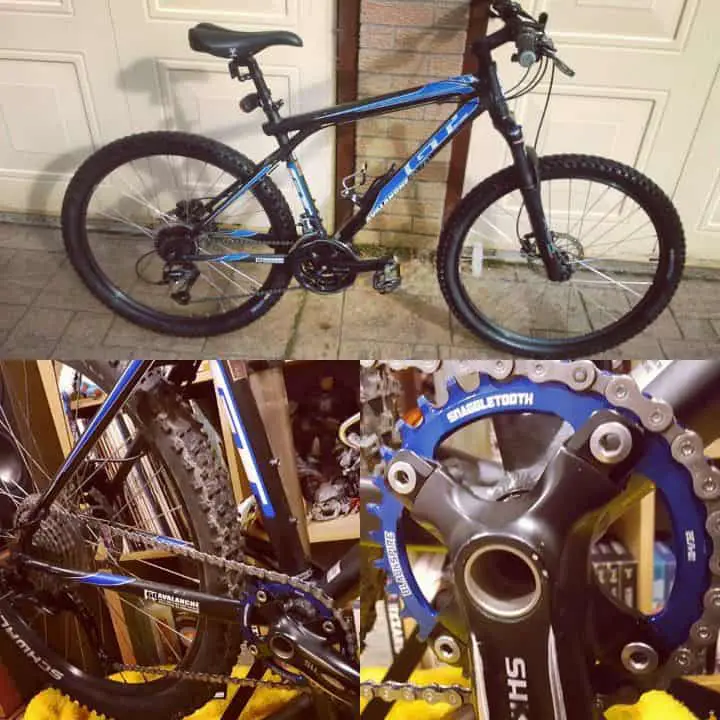
The final check you need to make before altering anything on your bike is the Freewheel or Freehub. The type of hub you have doesn’t matter too much what type of hub you have, the process is exactly the same.
Either take your chain off or put it into the highest gear you have. This is the smallest cog. Next, grab the biggest cog and try to move it around.
The cassette shouldn’t do anything but spin. If it does, a new freewheel is probably on the cards. You can try to service the hub and replace your bearings or grease but this commonly doesn’t fix the problem for long.
5. Derailleur Tightening
![]() Photo by @mrmascott10
Photo by @mrmascott10
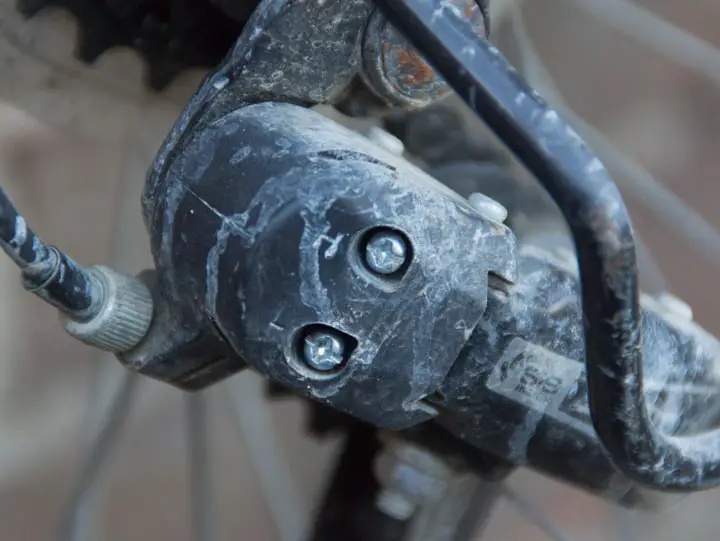
Derailleurs are a complex part of the bike. They have a large amount of moving parts but when you think about it they are very effective.
Rear derailleurs adjust its position to maintain chain tension and align the chain with the gears when switching through them. The bottom cog moves from side to side in order to align the chain with the corresponding chainring. When the chain is on the two smallest cogs the chain is at its slackest, meaning the derailleur has to coil up tighter in order to collect the slack.
On the other hand, when the chain is on its biggest chainrings the derailleur will extend and stretch itself due to the chain pulling on the derailleur.
The first step in tightening your chain with the derailleur is to release your gear cable and quick release. Pull your wheel back in the dropouts. There is not much space for adjustment in this area but when done carefully you can prevent a lot of fiddly adjustments.
If you’ve taken a closer look at your derailleur you’ll notice you have a couple of different screws. These correspond to the upper and lower limit of the derailleur. One of these screws moves the cog to the left and the other to the right.
Aligning this cog to its corresponding chainring correctly can brilliantly prevent your chain from falling off. To adjust these screws, put the chain on its smallest chainrings and turn the screw until it’s aligned well. Do the exact same to the upper limit with the chain on it’s biggest chainring.
6. Shortening a Multi-Gear Chain
Don’t just randomly take links out of your chain and hope it ends up being the right length. There is a fairly reliable way of finding out the correct length for your chain. It’s a good idea to go through all the above steps before shortening the actual chain.
Firstly wrap your chain around the biggest chainring, derailleur and largest cog on your cassette. For a chain to be the correct length it should overlap by approximately one link when placed on the largest chainrings.
If your chain fits this criterion then link it back up, otherwise remove the specific amount of links until the chain overlaps by one link.
After making all these adjustments and tightening everything back up be sure to go for a ride and test everything again.
Mountain Bike Chain Shortening Steps
- Only alter your chain if it’s slipping or falling off.
- Make sure worn chainrings aren’t causing the problem.
- Tighten, clean or replace your bottom bracket.
- Ensure your freewheel or freehub is tight.
- Tighten with your derailleur.
- Shorten your chain.


