Big improvements can be made in virtually anything via small, free adjustments. These changes aren’t set rules that need to be followed in order to gain an edge, rather certain things you need to test to find the optimal settings.
Tire pressure is one of these factors within the cycling world. Most people just inflate their tires until they feel hard and then go for a ride. Some people may Google the optimal tire pressure for what they’re riding but very few will actually work towards getting the perfect pressure for their riding style.
We are going to explain the best tire pressures for each form of riding in this article but we’re going to concentrate on explaining how to optimize your tire pressure and find the perfect pressure for your preferred riding style.
How to Measure Tire Pressure?
Even without a puncture or leak your tires will very slowly leak some air. This can be a result of regular use or a long period of no use. I am oversimplifying this fact as certain tubes and properly installed tubeless tires will take a long time to lose a significant amount of air but the fact remains that it does happen.
Tire pressure fluctuations can be caused by factors other than normal use. Temperature, humidity, pressure and rider weight are all things known for affecting. BMX tires are normally ridden with highly inflated tires. This excessive pressure can affect the hardware and increase the speed at which it loses air.
After reading that you’re probably not surprised that I recommend checking your tire very regularly. Advanced riders check their tires before every ride but personally I check mine every week or after every few trips. It’s important to develop a habit of checking them regularly without it being too much of a hassle.
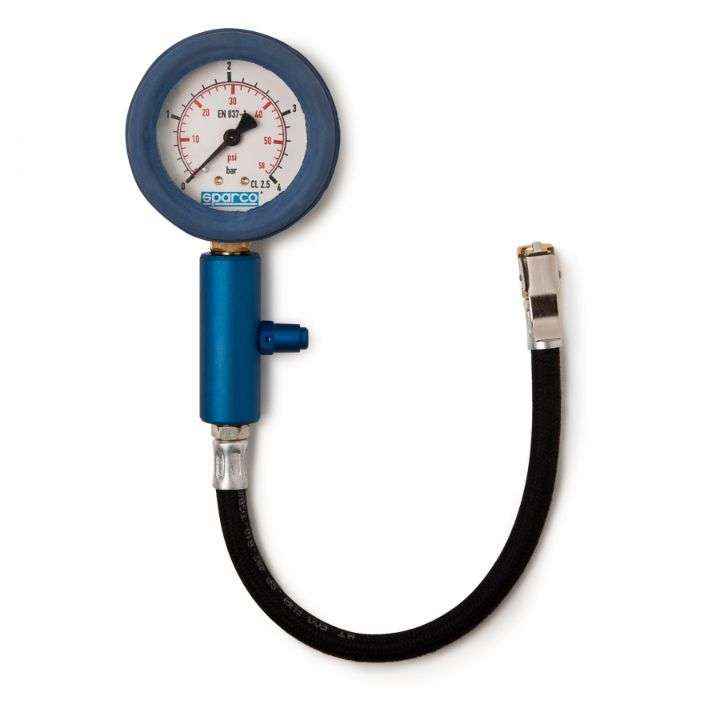
There are two ways to check the pressure in your BMX tires. The most obvious is to use a tire pressure gauge. These are normally quite cheap, small in size and super easy to use. Pressure gauges are very simple. Simply press the valve hole onto the tire’s valve and then read the meter. The reason it’s so simple is that the technology is too. The device will open the valve and allow some air into its chamber, all it has to do then is read the pressure of the air that is pushing on it.
The most important thing when buying one of these products is to get one that fits your innertubes. If you didn’t already know, there are two types of valves on a bike. The Schrader valve is the most common. A shorter stem and a rubber cylindrical tube topped with a metal threaded section will help you discern these from the less common Presta valves. These are the tall ones with no rubber and a thin threaded stem. It’s highly unlikely for a BMX tire to be using a Presta valve but it’s worth mentioning in case you are one of the few that do. A lot of pressure gauges and pumps will come with the functionality of measuring both types of tube but it’s always important to check because if you buy the wrong one.
Regular pumps are the second method, most people will use. As the products have improved and the technology has cheapened, it’s become very common to find pressure gauges built into the pump itself. Unless you’re buying one for portability pressure gauges for BMX riding has become pretty obsolete. Pumps with gauges built-in are now small enough to carry anywhere you need to go while also having the benefit of being able to pump up your tires if need be. The method of use is the same as I mentioned above. Just press onto your valve and read.
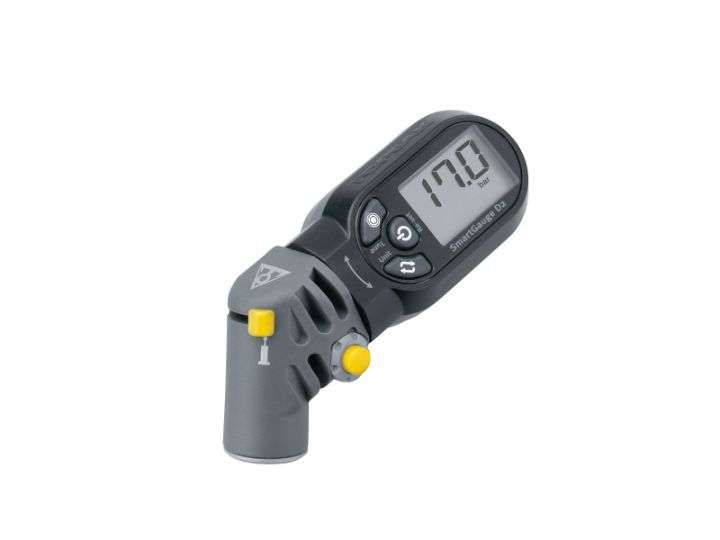
Topeak SmartGauge D2
Similar to Lezyne, mentioned below, Topeak has been creating cycling accessories for people to use alongside their bicycles. Instead of joining the saturated market of bikes and bike parts, they decided to put all their effort into the things that keep your bike working properly.
Pressure gauges are one of these products. There are so many different variations of pressure gauges that it’s hard to describe the anatomy of the product after the obligatory valve adaptor.
Topeak themselves have nearly 10 different pressure gauges to choose from. All of a similar size and all providing the same functions.
I included the SmartGauge in this post because of the clear screen, easy to use buttons and overall functionality. The gauge can read both Presta and Schrader valves without any extra equipment. The super easy to read screen can show tire pressure in multiple units. The head of the reader can also be rotated so the screen can be read easily at any angle. The reader has a max pressure reading of 250 PSI and is suitable for tires, suspension forks and rear shocks.Click Here to Check Best Price
Tubeless vs Inner tubes
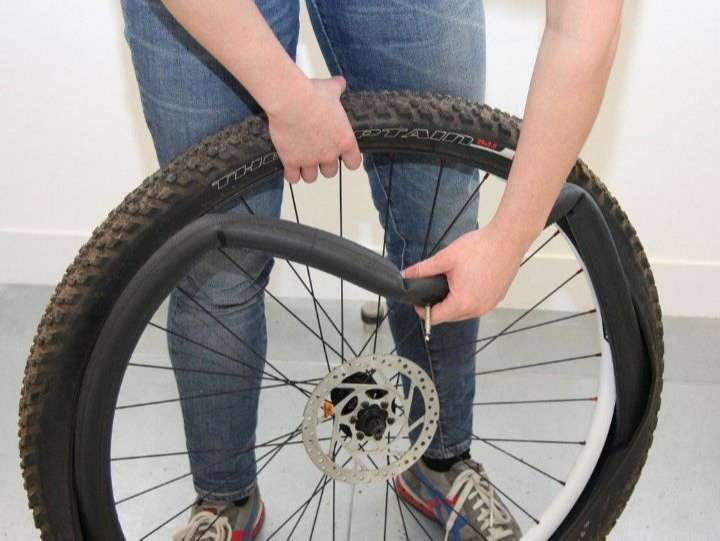
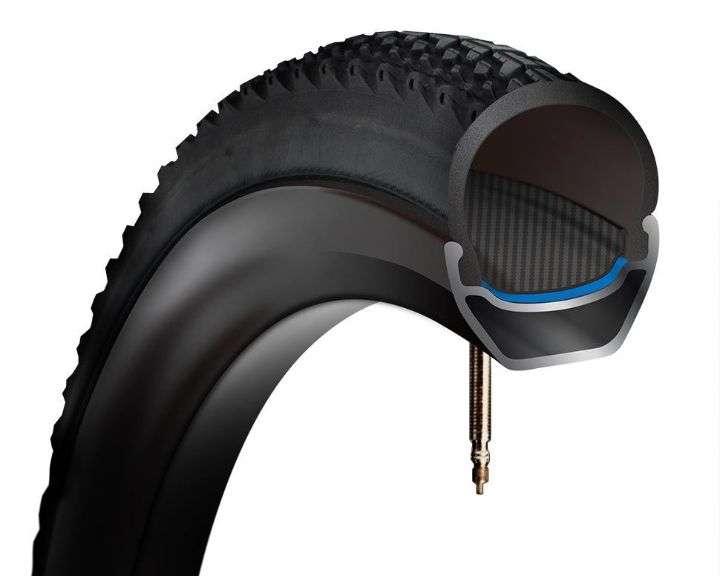
Tubeless tires were long-only used on cars and motorbikes. Due to the cheapness of inner tubes, bicycles never completely adopted tubeless tires.
Recently you may have noticed tubeless tires becoming more and more popular. The technology involved in creating wheels and tires suitable for tubeless riding has become better and better.
In a tubeless setup the tire, rim and valve are manufactured to create and keep a perfect seal between them. A liquid sealant is often injected inside the to plug any small holes or imperfect areas.
Many bike rims are now tubeless compatible. This means you can attach a valve to the rim and use the wheel without an innertube. It’s great knowing you can switch over to tubeless if you want to but I personally wouldn’t on a BMX.
My reluctance for going tubeless on my BMX is predicated on the fact most of the advantages of tubeless tires are nullified by the basics of BMX setup.
Firstly, a big advantage of tubeless wheels is the ability to run your wheels at lower tire pressures without risking punctures from pinching the innertube. This is great for mountain biking but as you’ll read in this article, there is never any need to have soft tires on a BMX.
The other big issue for me is when you do end up getting a puncture. A sealant is injected into the tires to self fill small punctures before you lose any air. This is great when riding soft tires but hard BMX tires are often reported to simply push the sealant straight through the puncture hole.
Is higher PSI always better?
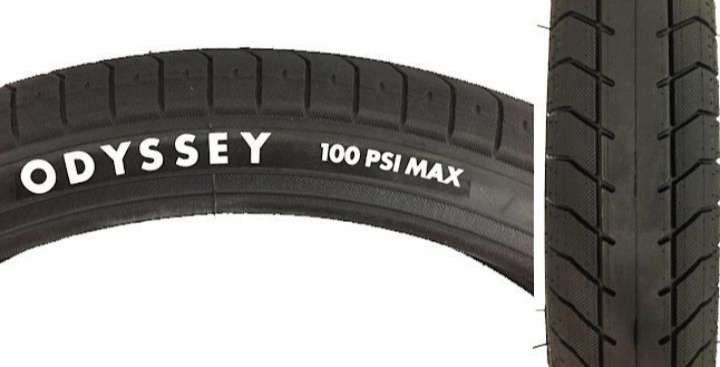
It depends! Before I get into the details, professional riders often ride with harder tires.
Both lower tire pressure and fatter tires will offer greater shock absorption at the cost of rolling resistance. Lower tire pressures will offer less balance and an increased likelihood of pinching your innertube and getting a flat, while fat tires may not always fit a BMX and can make it a little harder to control.
In my opinion, harder tires will be better for most riding. Saying ‘harder tires’ doesn’t mean both front and back need to be the same, I think a slightly softer or thicker tire on the back is better.
The softer front tire will keep your bike agile and easy to throw around while the back wheel will protect your wrists from hard landings.
On a final note, different riding styles have different preferential pressures. The two main examples of this are flatland and dirt jumping, the two most opposite styles.
Flatland bikes need harder tires as it’s very floor centric and requires a super nimble bike that gives a lot of feeling. On the other hand, dirt jumping is a lot closer to MTB and can benefit from slightly softer tires. The trails are never as smooth as concrete and you can get some hard landings. It’s important to still keep your tire out of the pinch flat zone when setting up for dirt jumping though.
What PSI should I use?
If you’ve read the sections above then you’ll have probably realised there is no definitive answer to the best PSI for BMX, although there is a range of the pressures you should test before aiming for a certain one indefinitely.
The following recommendations are based predominantly on personal preference and averages. Remember that most tires have a maximum tire pressure of around 100 – 110 PSI, while pinch flats happen around 30 – 40 PSI. Different sized riders of different skill levels could benefit from different pressures but I think these are a good base digit for most people.
BMX DJ Tire Pressure Recommendation
Dirt jumping on a BMX is a complex mix between BMX and mountain biking. Dirt jump tracks designed specifically for DJ bikes and those for BMX bikes can vary quite drastically in terms of smoothness and quality.
For these reasons, it’s quite hard to recommend a specific tire pressure for this type of riding. Presuming you only ride high-quality tracks for BMX bikes I would recommend a relatively hard tire with a slight variation between front and back wheels. Personally I think around 85 in the front and 75 in the back would suit dirt riding well.
Tire Pressure for BMX Street
Street riding predominantly consists of harsh surfaces, unpredictable terrain and big landings. Unlike park riding where you know pretty much every surface will be smooth and every ramp is dialled in, street riders thrive on the complication of riding anything and everything.
For this fact, I advise having a slightly softer tire, around 55 – 75 PSI. This will protect your wrists while keeping your bike nimble. I would also keep both tires at a similar pressure. This figure is only described as soft relative to the other figures I’ve recommended on this list, the tire should still be quite hard.
What Tire Pressure for Park Riding?
As I mentioned above, park riding is a little more forgiving than street riding. The jumps and gaps are often bigger but you can trust the surfaces a little more. The ramps are also professionally designed and, as long as you land correctly, will give you a relatively smooth transition.
I think park riding has the widest range of tire pressures. It’s probably the most popular discipline with the widest range of body types and skill levels. Having said that, my recommendation is around 80 PSI.
Many people ride skateparks with much harder tires, sometimes around 100 PSI, but I think 80 PSI is great for the vast majority of people. It’ll be a little less forgiving on hard drops but the speed and agility of your bike will be much better.
Our Favorite Bicycle Pumps
Bike pumps are developed in various types and sizes. Foot pumps are operated by repeatedly standing on a lever. These can have single or dual cylinders and sometimes pump a large volume of air.
Secondly, there are handheld pumps. Larger pumps are placed on the floor, held in place by your feet and then operated by lifting and lowering a handle with two hands. These pumps are larger and relatively un-portable. People usually buy floor pumps to store in a car or garage.
Finally, there are handheld pumps. Very simple and self-explanatory as you simply hold the pump and slide the plunger with one hand. These are great for taking on a ride and often really help out when you get a puncture far from home.
There are so many different bike pumps out there and the technology in each is so similar to the ‘best’ bike pump is hard to define. I will list a couple of my favourite pumps by way of build quality and aesthetics below.
Lezyne Micro Floor Drive BMX Pump
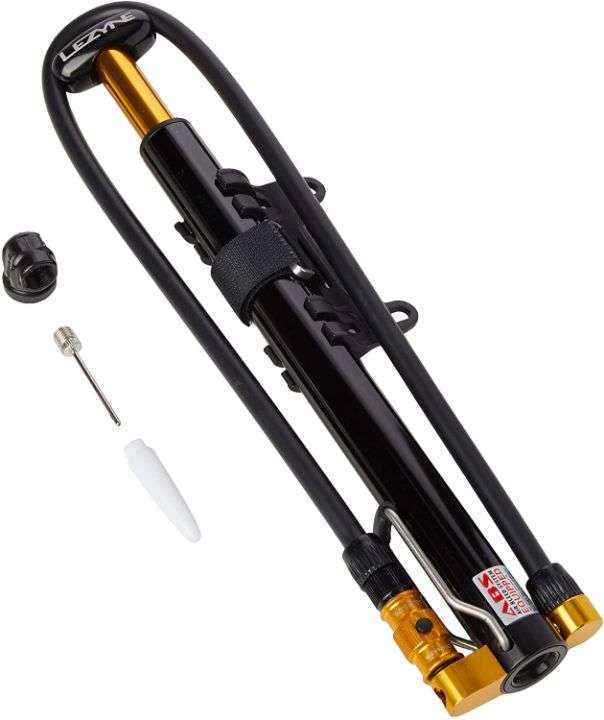
Micki Kozucheck, an icon in German cycling, created Lezyne after several similar companies in March of 2007. This new company aimed to bring some high quality to the world of cycling parts and accessories.
Instead of creating bike parts, Lezyne has instead focussed on accessories and mechanical products that are used alongside your bike. The market lacked high-quality manufactures that built these parts.
Bike pumps are one of the products the company has put a lot of effort into creating. If you’re looking for the best quality pump possible then Lezyne is probably the place to go. Some of their products sell for hundreds.
I’m including the Micro Floor Drive pump in this post because it’s pushing the boundaries in terms of the current technology and quality of handheld pumps.
After unfolding the super portable pump you’re presented with a small metal stand to place your foot and a one-handed plunger. Similarly to the tall floor pumps, you keep this pump in place via your feet while pushing down on the plunger from above.
Unlike many handheld pumps, Lezyne has added an advanced, digital pressure gauge display. Using this will be much clearer and more accurate when pumping your tires to the pressure you’ve decided to use after reading this post.Click Here to Check Best Price
How to Put Air in Bike Tires?
Putting air into your bike tire is easy when you know how. It’s very similar to adding air to your car or motorbike tires.
1. The first step is to remove the valve stem cap from your bike. Your valve cap will easily unscrew from the valve.
2. Next, connect the pump to the valve. This technique is different depending on your bike pump. Most pumps will have you press the connector onto the valve and then lock it on with a lever. Some pumps will just push onto the valve and some may screw on.
3. Inflate your tires by using the bike pump. Bike pumps can be done by hand, foot or with an electric pump.
4. Once your tire pressure feels hard or has reached your desired tire pressure you can stop pumping and remove the pump from the valve.
5. If you’re happy with the pressure then replace the valve cap and carry on riding.
How Long Do BMX Tires Last?
BMX tires will last varying amounts of time depending on how much you use your bike and how hard you ride. Riding on gravel or dirt may wear your tires down faster as there’s a lot more factors affecting the friction. Anyone riding with brakes and skidding a lot may see their tires wear down faster.
I would expect my BMX tires to last at least 4 – 5 months considering the amount of riding I do.
How much does it cost to replace a BMX tire?
A BMX tire can be replaced quickly and easily. The tire usually costs between $20 and $50 depending on the brand and type. If you aren’t capable of fitting the tire yourself then some bike shops may charge in the region of $10 to complete the fitting.
How to Lower PSI in Tires?
Lowering your tire pressure is easier than inflating them. You need to start by removing your valve cap.
If you have a presta valve you need to unscrew the top of the valve. Once fully unscrewed you can simply press on the top to release some air. Stop pressing the valve when you’re finished deflating the tire.
Schrader valves are the ones you often see on cars. They are ever so slightly more tricky to deflate. Once you’ve removed the valve cap you need a nail, a screwdriver, a valve cap or something else sharp. You need to press this item into the centre of the valve. You’ll see the pin that needs pressing.
How to Check Bicycle Tires Without a Gauge?
There’s no way to accurately check your tire pressure without a pressure gauge. There are a couple of tells that will indicate you need to inflate or deflate your tires.
Road bike tires need to be very firm. When you press on them side to side you shouldn’t be able to feel much movement. If you can then you need to inflate your road bike tire.
On a mountain bike you should get on your bike and look down. If the bottom of your tire protrudes wider than the top of the tire by more than a few millimetres then it needs some more air. On the other hand, if you squeeze the tire and it’s rock hard then you need to let some air out.
How to Convert between BAR and PSI?
To convert from PSI to BAR, divide the PSI by 1.01. BAR is a metric unit of pressure but not bart of the International System of Units. 1 BAR is around the same amount of pressure as the Earth’s atmosphere at sea level.


